
Metadata Store
Exploring the Pentaho Data Catalog Metadata Store ..
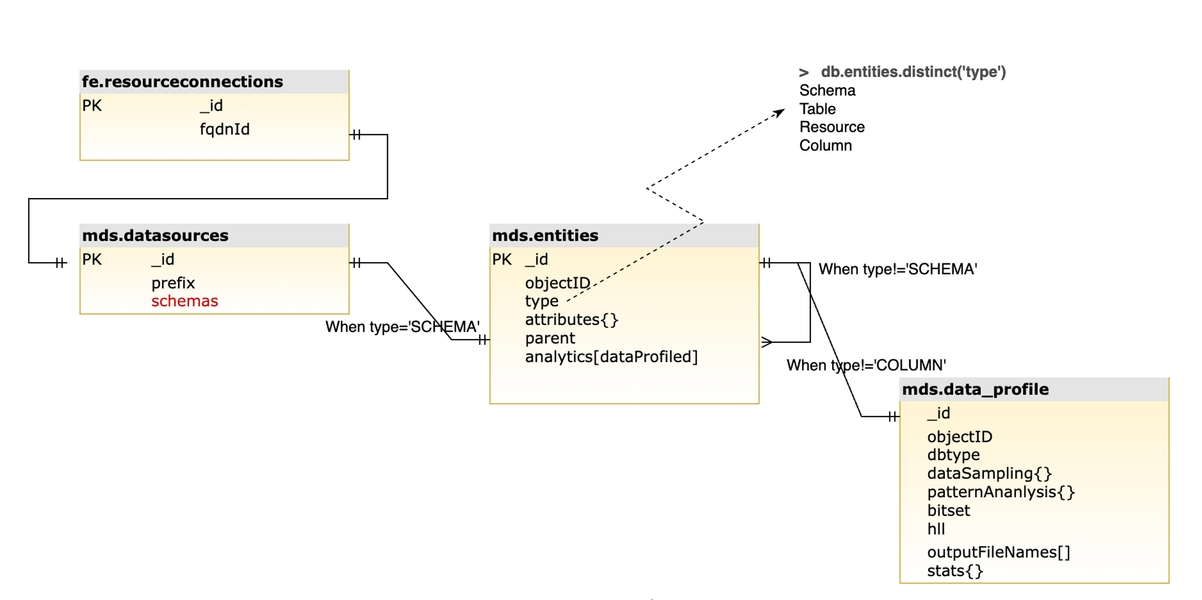
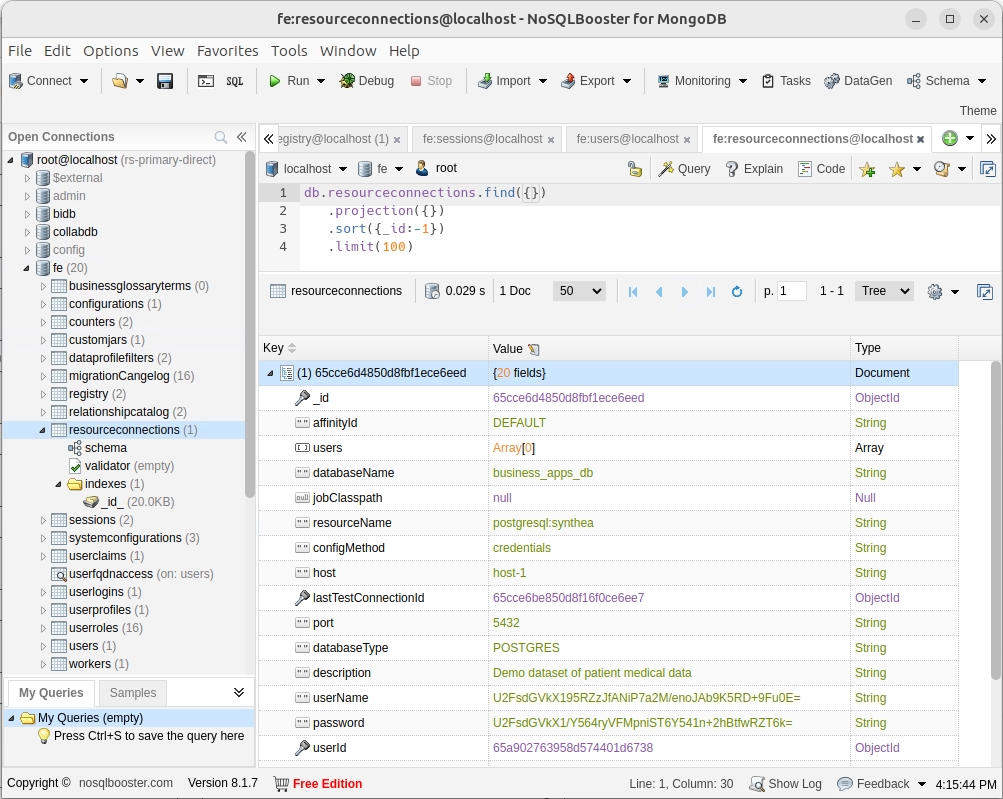
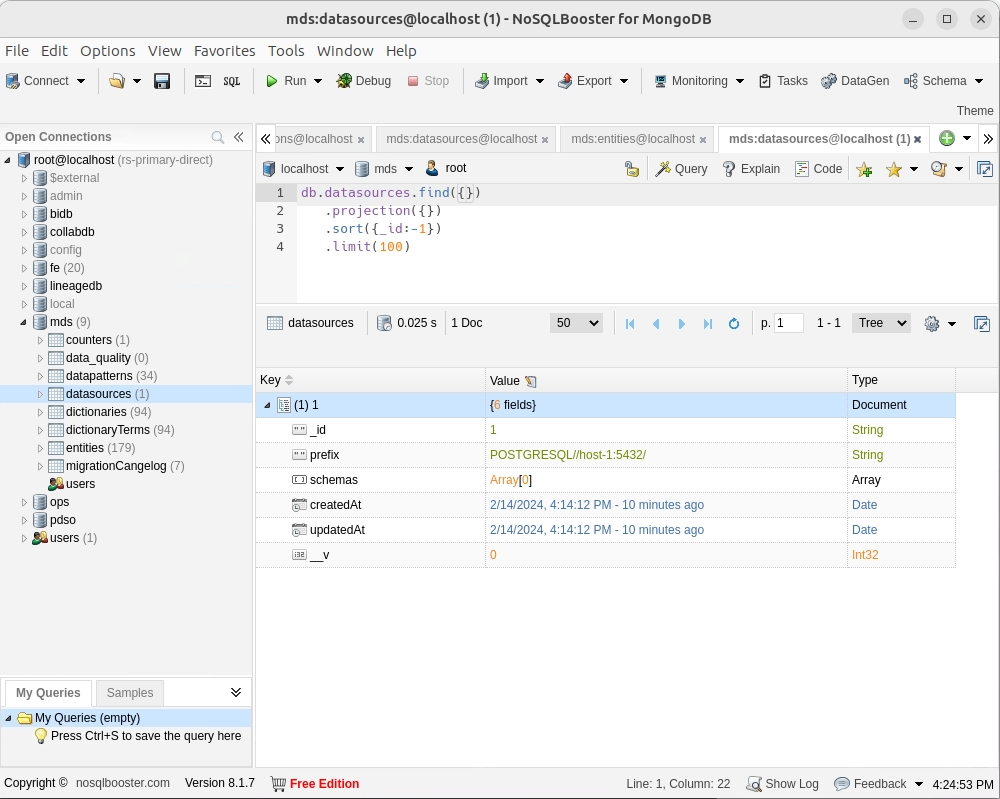
Connect to Metadata Store
Run NoSQLBooster.
database
database
table
collection
column
field
row (record)
document
Run NoSQLBooster.
In the Query panel, enter the following SQL statement.
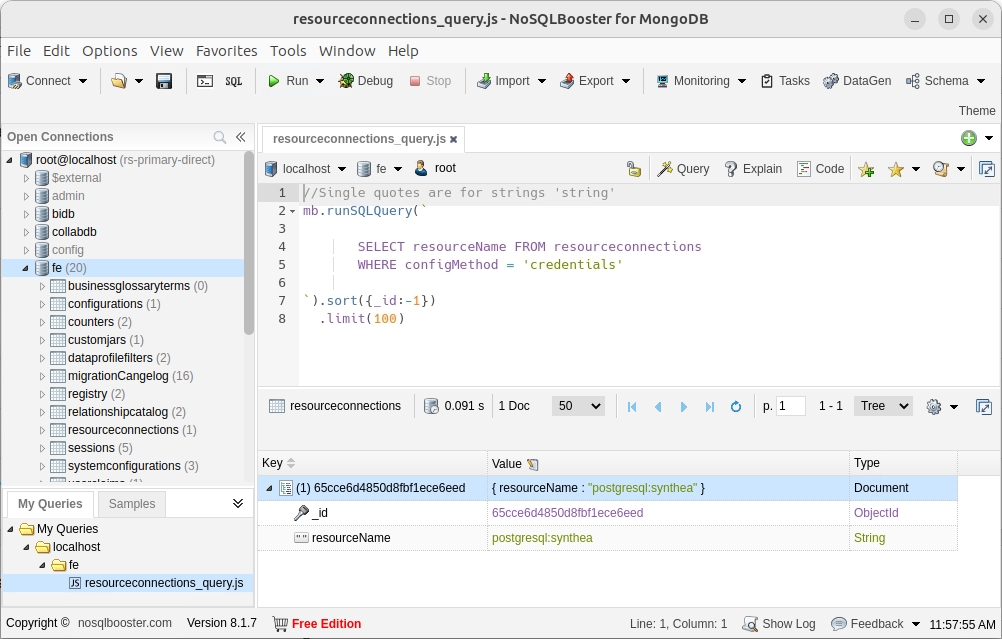
As expected the result is: postgresql:synthea as there's currently only 1 connection defined.
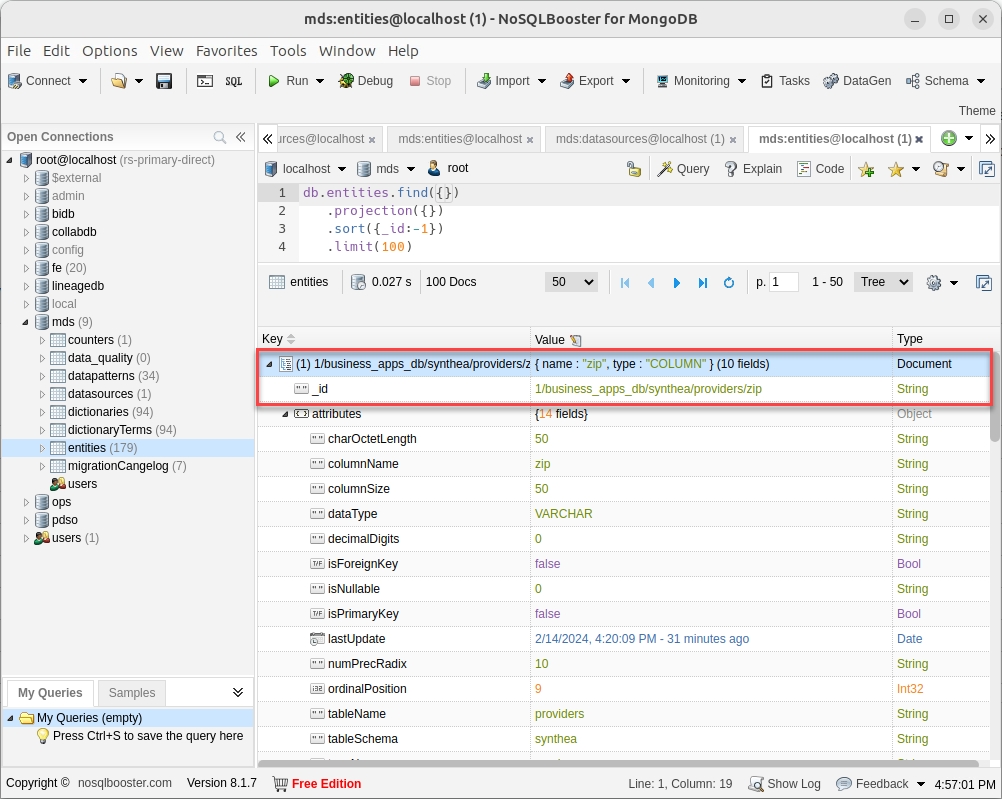
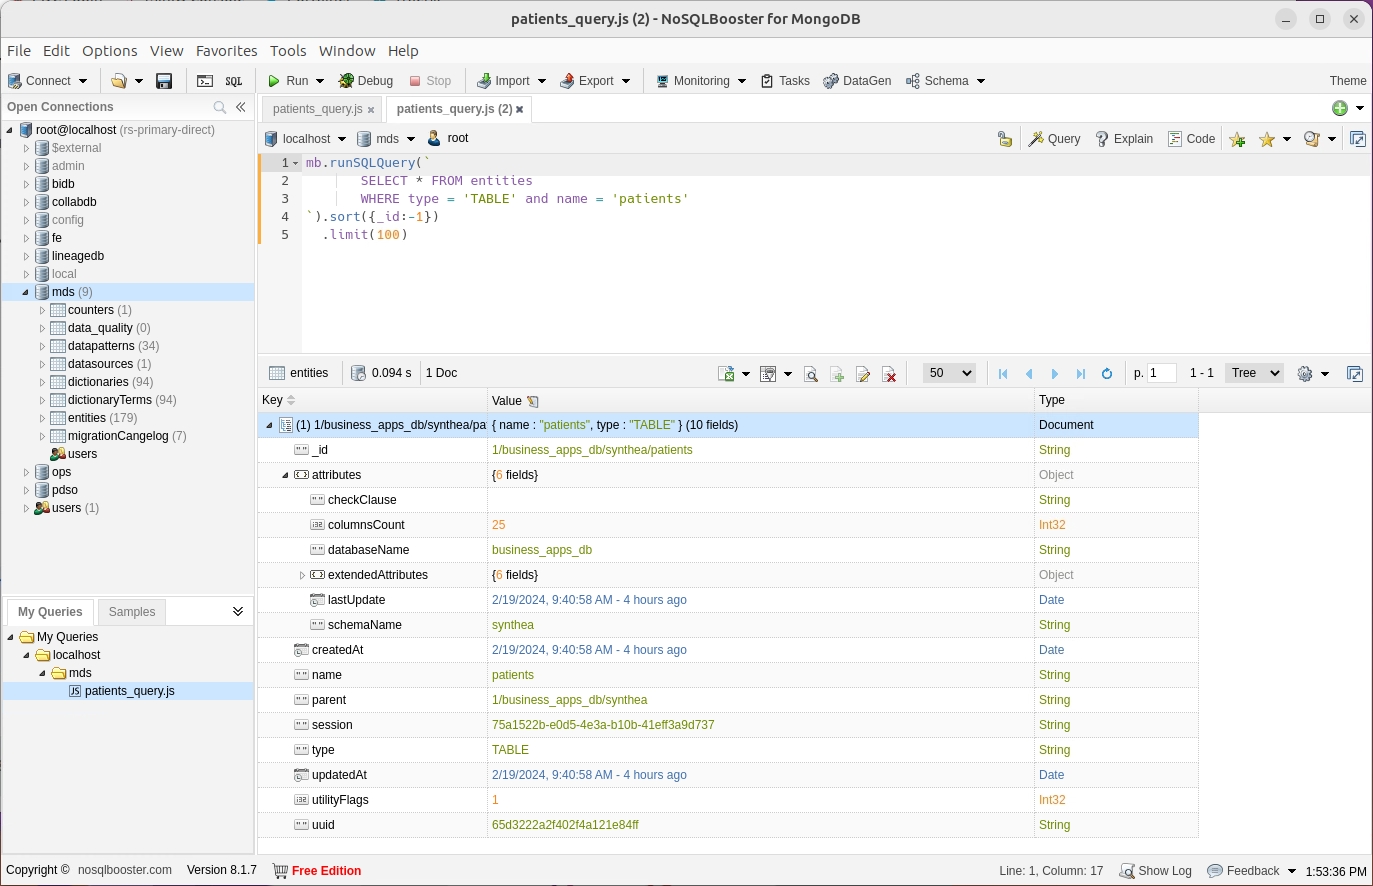
Edit the query to retrieve the fields on the 'patients' table (you could have ingested more than 1 schema).
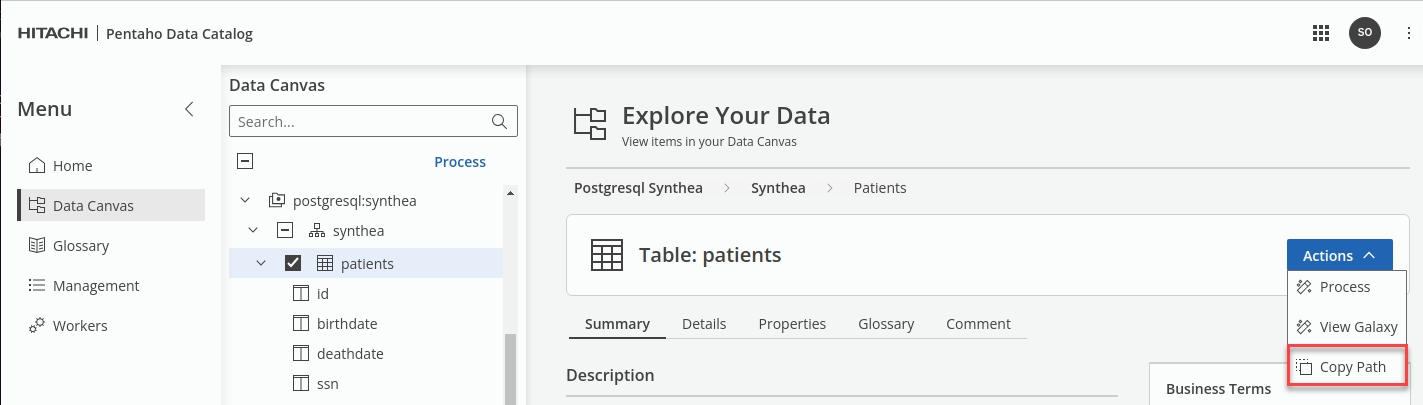
TIP: To find the TABLE _id, under Actions select the option: Copy path.
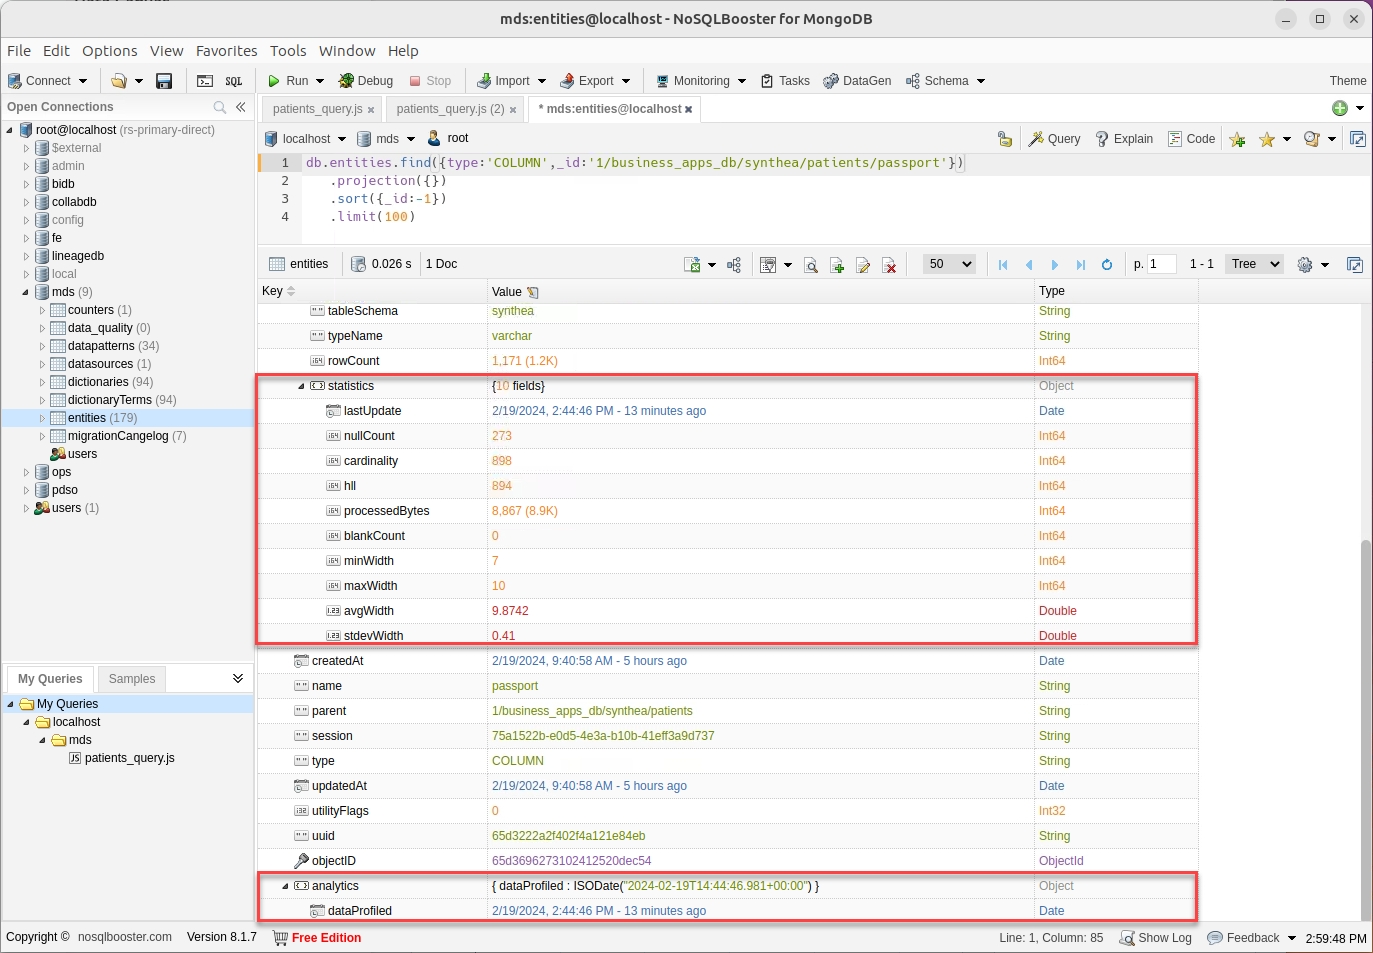
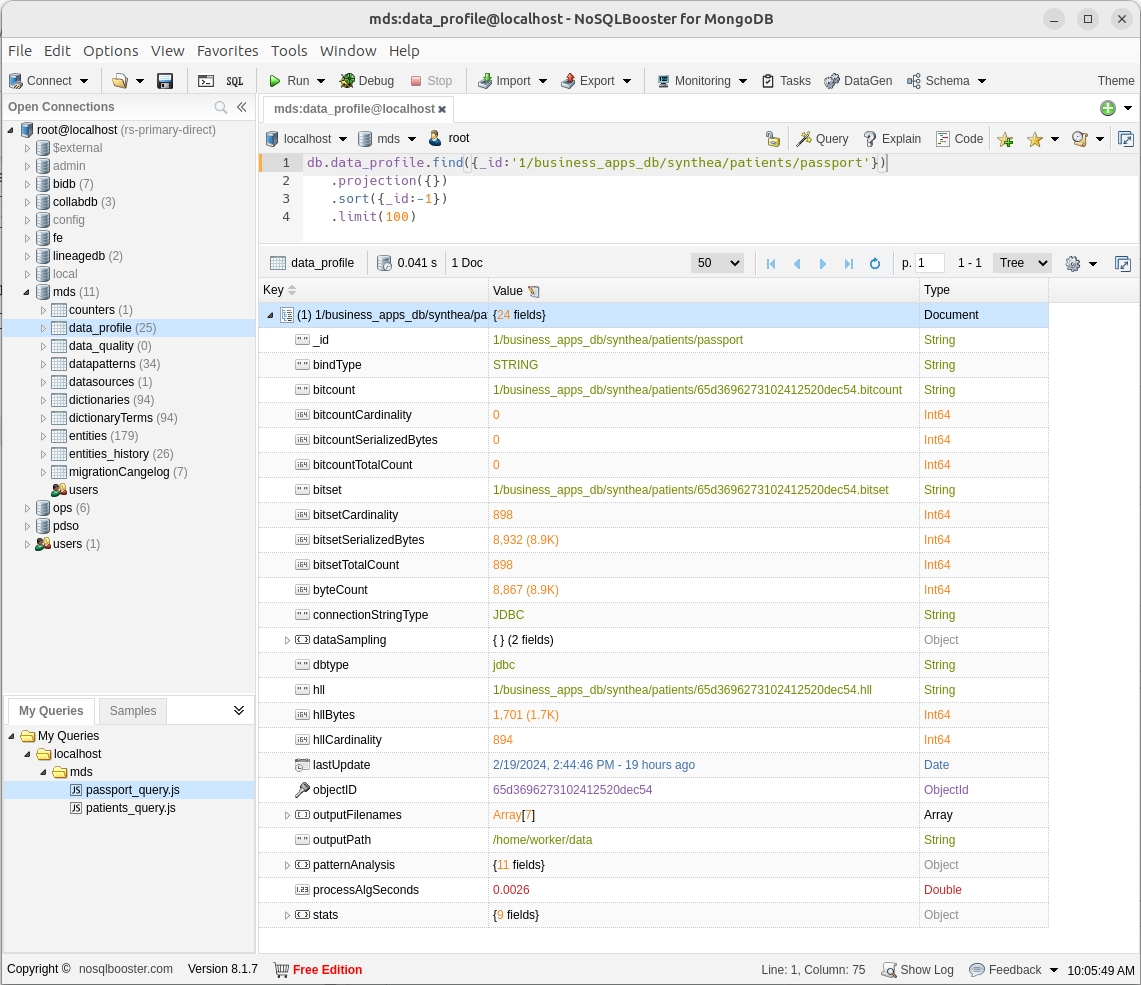
The intermediate data generated for each column of data includes:
Roaring Bitset
A bitmap of the hash values for all entries in the column.
HyperLogLog (HLL)
Provides an estimate of the cardinality of the data, with a roughly ~2% margin of error.
Data Pattern Analysis
Performs a rudimentary data pattern analysis using dimensional reduction, tracking the most frequently occurring patterns.
Data Quality Pre-Analysis
Using the Data Pattern Analysis results, Data Catalog performs a statistical estimation of the data quality is performed. This is summarized as an overall percentage as well as a heat map for each data pattern. Additionally, Data Catalog makes RegEx recommendations for the most probable matches.
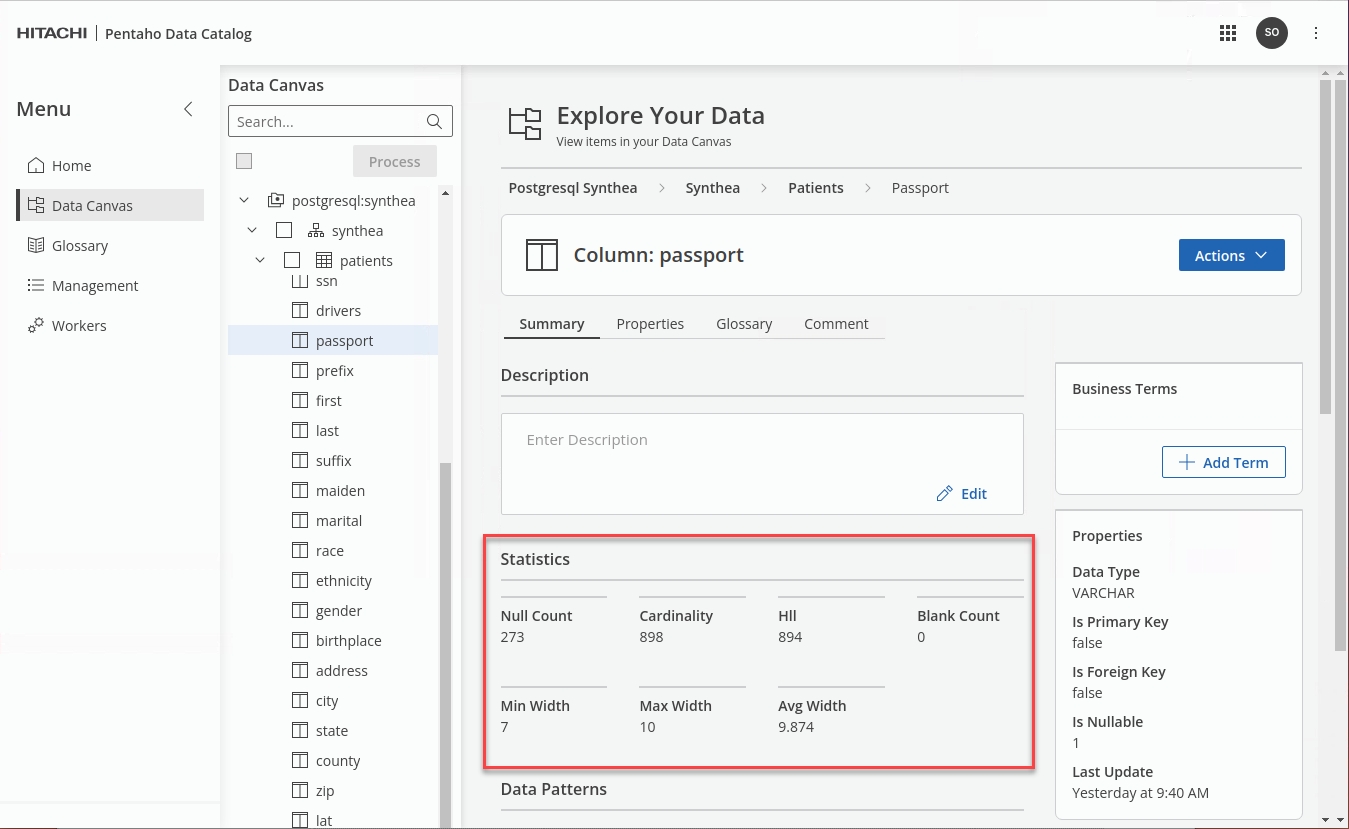
Statistics
Data Catalog gathers the following statistics when examining all the data:
• Minimum and Maximum values (for numeric columns)
• Widest and Narrowest (non-null) string widths
• Null count
• Total row count
Data Sampling
Data Catalog takes a controlled sampling of the data so that the samples are consistently chosen across different columns.
Edit the query to retrieve the fields for the 'patients.passport' column.
TIP: To find the COLUMN _id, under Actions select the option: Copy path.
Edit the query to retrieve the fields for the 'mds.data_profile.patients.passport' column.
x
x
x
To watch the videos please copy and paste the website URL into your host Chrome browser.
x
Be aware this exposes MongoDB port ..!
Navigate to the PDC depolyment folder.
Edit docker-compose.yml file.
Uncomment ports under mongodb in docker-compose.yml
Save changes.
Restart PDC.
Ensure all the containers successfully restart ..
Download NoSQLBooster.
Untar the package.
Move the NoSQLBooster folder to home.
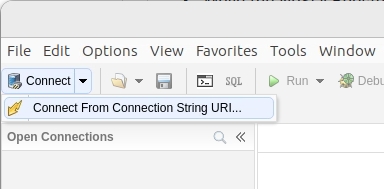
Run NoSQLBooster.
Run NoSQLBooster.
From the Connect option -> Connect From Connection String URI
Enter the following details.
Connection string
mongodb://root:broot@localhost:27017
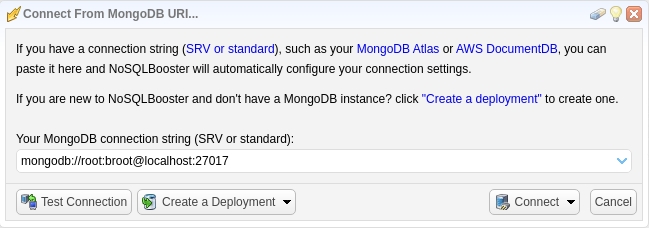
Finally .. click 'Connect'
Troubleshooting
When a VM is started up, sometimes not all Docker PDC docker containers start up and as a result some functionality may not work such as:
Login page not showing login panel
Register Page not creating root user
Adding a data source and Test Connection button doesn't work
In this case, navigate to the PDC docker deployment location (/opt/pentaho/pdc-docker-deployment) and run ./pdc.sh up to ensure all PDC containers are running.
Ensure you have enabled the MongoDB ports: Enable MongoDB ports
Update the Ubuntu system’s repositories.
Download MongoDB compass.
You may need to edit the version in the request below.
Install MongoDB Compass.
Click on New Connection.
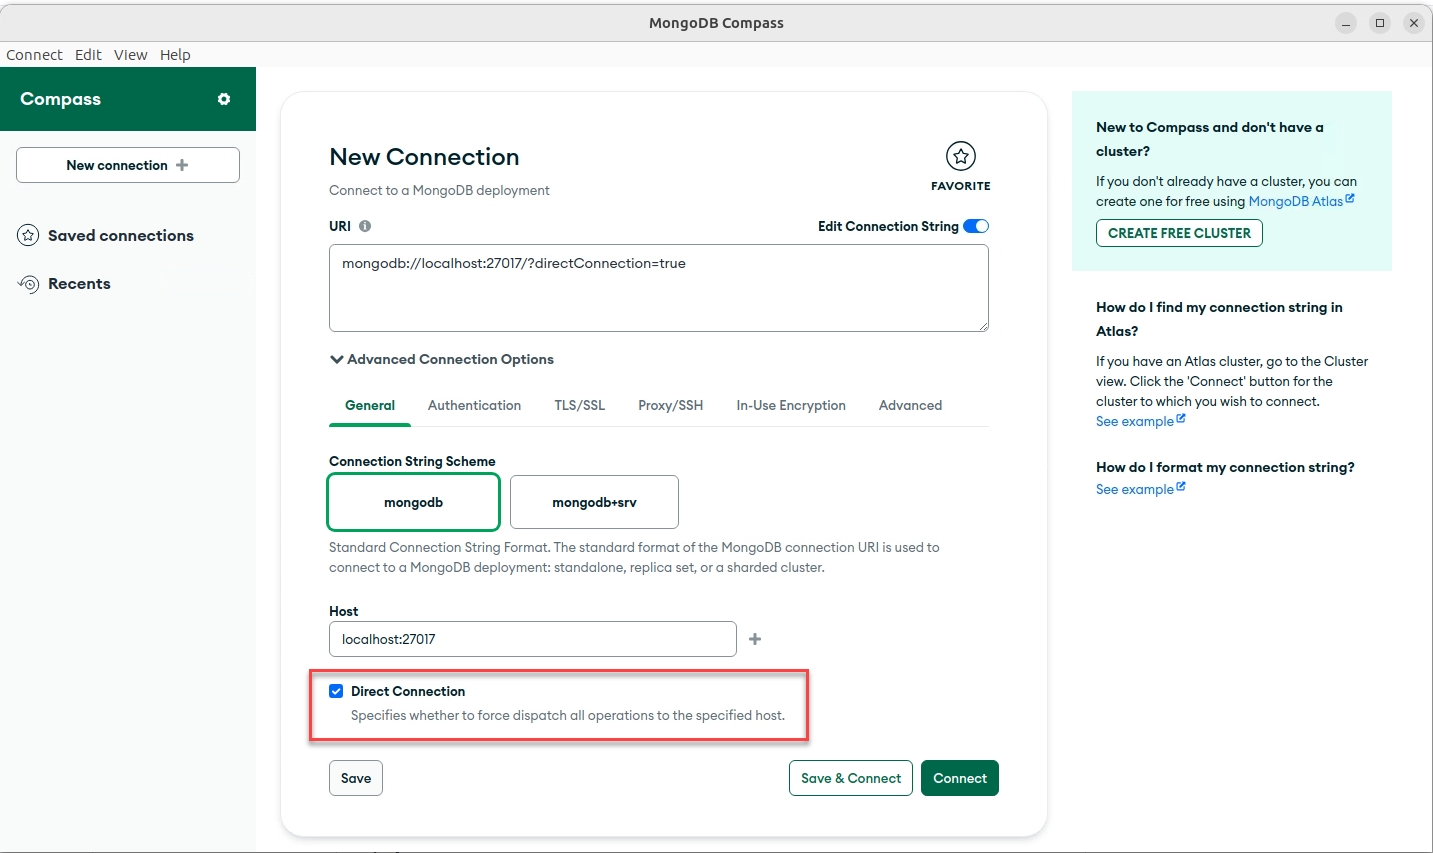
Ensure you check the option: Direct Connection
Click on the Authentication option.
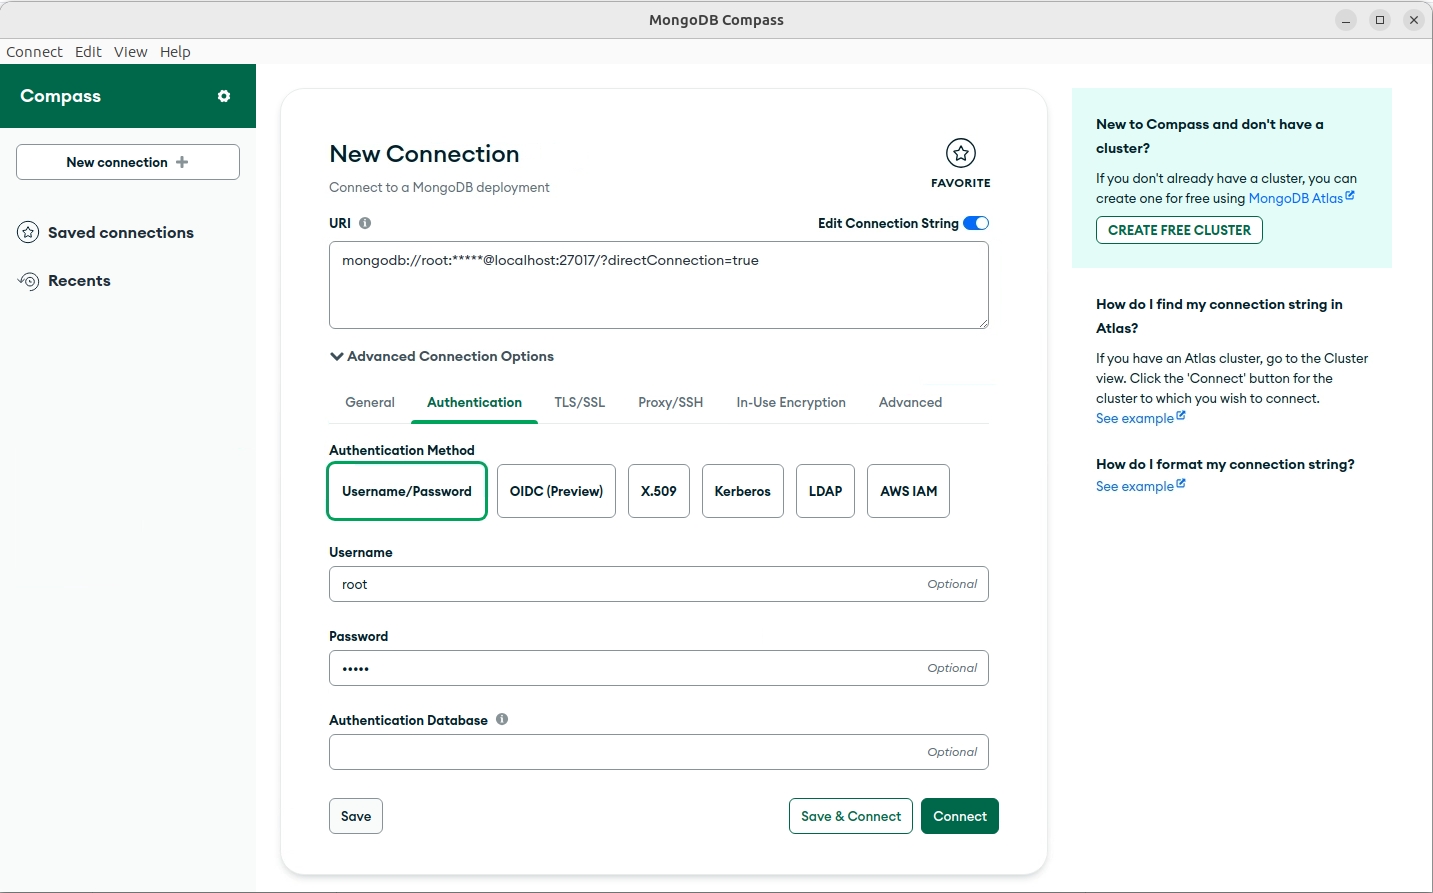
Enter the following details:
Username
root
Password
broot
Click Connect.

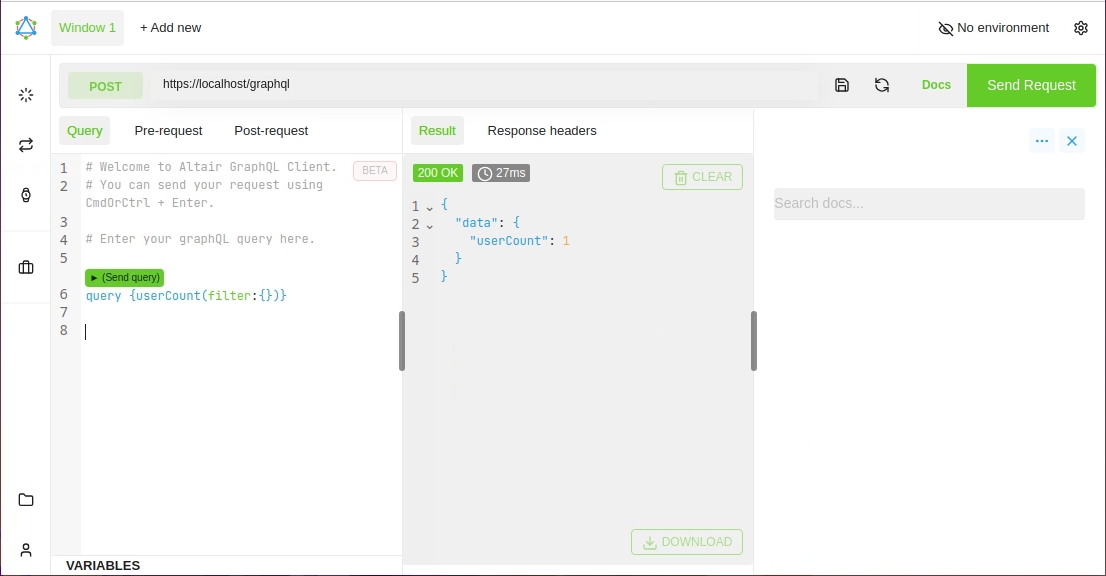
To access Altair: http://localhost/graghql2
Enter your query:
query {userCount(filter:{})}
Number of Users
query {userMany(limit:100){ email
date
firstName
lastName
lastLogin
modified
modifiedBy
status
_id }}
Returns User information - Limit 100
Install Java
Ensure the
aptlibraries are updated.
Check if Java has been installed.
To see all available editions of OpenJDK.
Install OpenJDK 21 JDK.
Install OpenJDK 21 JRE.
Check installation.
Set the Java environment variables
Edit the
.bashrcfile in your home directory.
Add the following lines to the bottom of the file.
Save.
Source to apply changes.
Echo
JAVA_HOMEandPATHto verify they are set correctly.
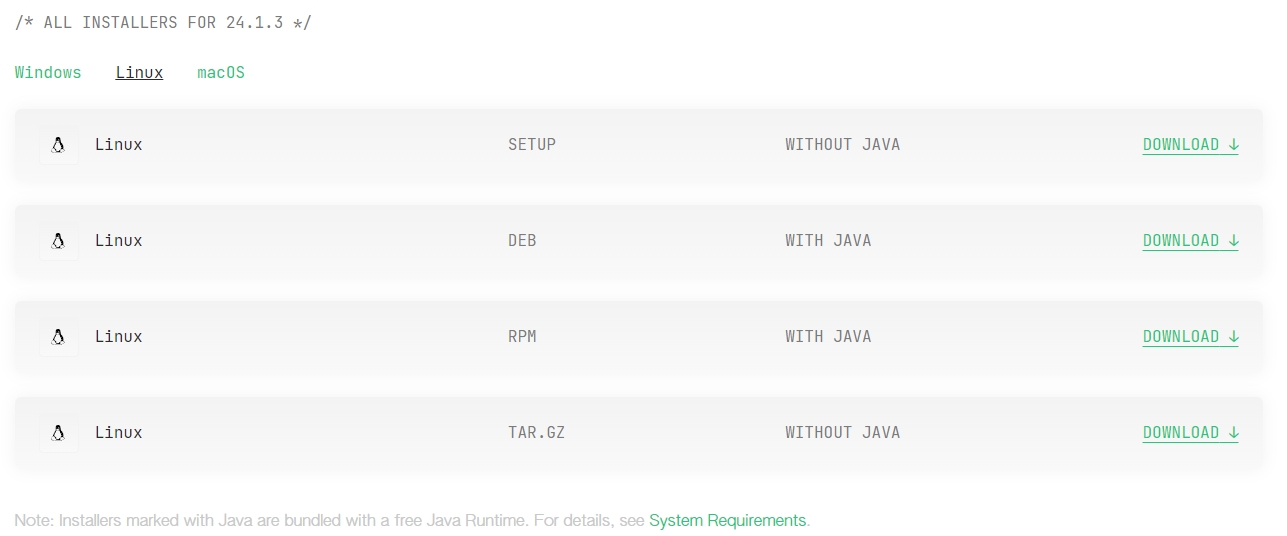
Install DbVisualizer
Download the Linux - without Java version.

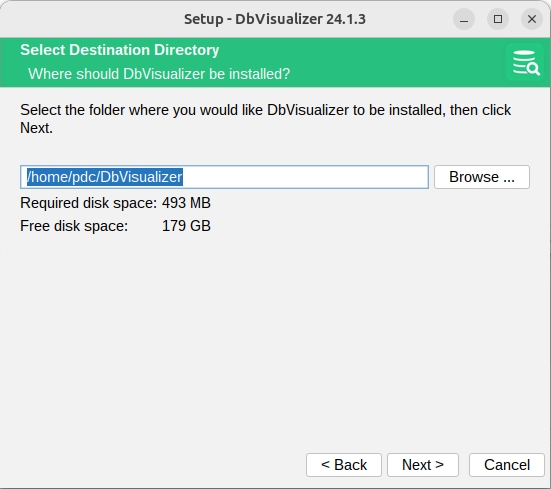
Execute the script located in the Downloads directory.
Ensure the file has execute permission.
You will need to edit the version before executing the shell script.
Accept the default path / settings.
Once 'Finished'. Accept Free license forever.
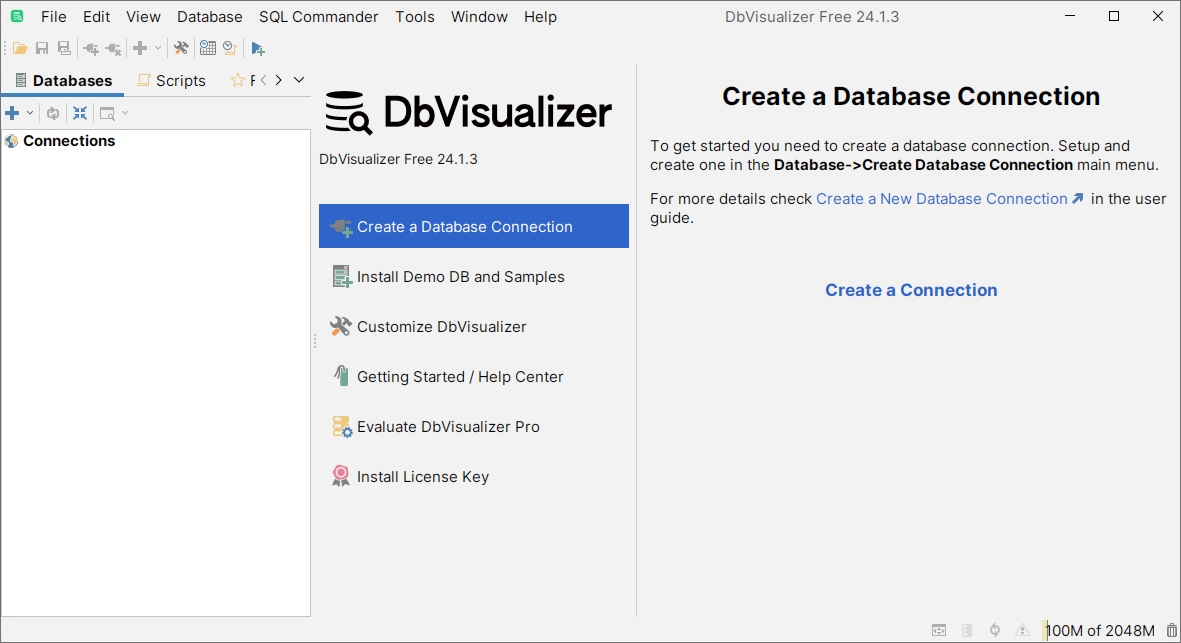
To start DbVisualizer.
Start DBVisualizer.
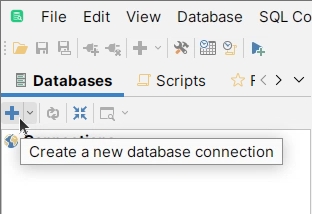
Click on the blue cross to create a new connection.
From the drop-down list, select MySQL 5.
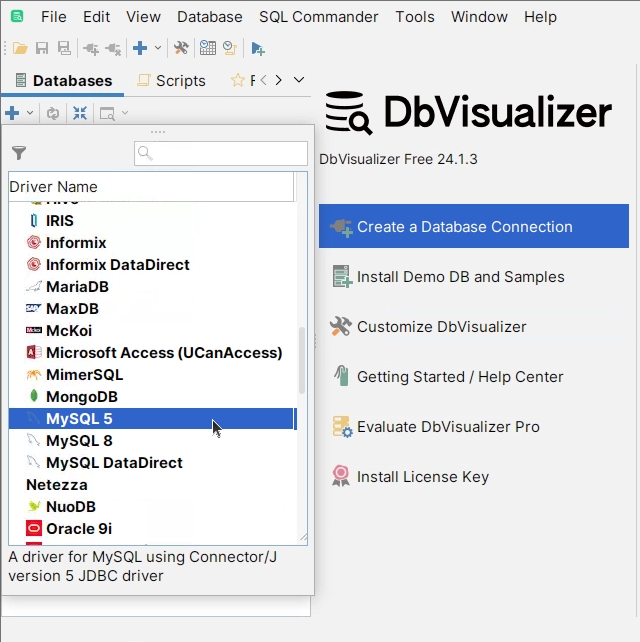
Enter the following details:
Connection Name
BIDB
Database Server
localhost
Database Port
3307
Use SSL
Automatic
Database Userid
root
Database Password
groot
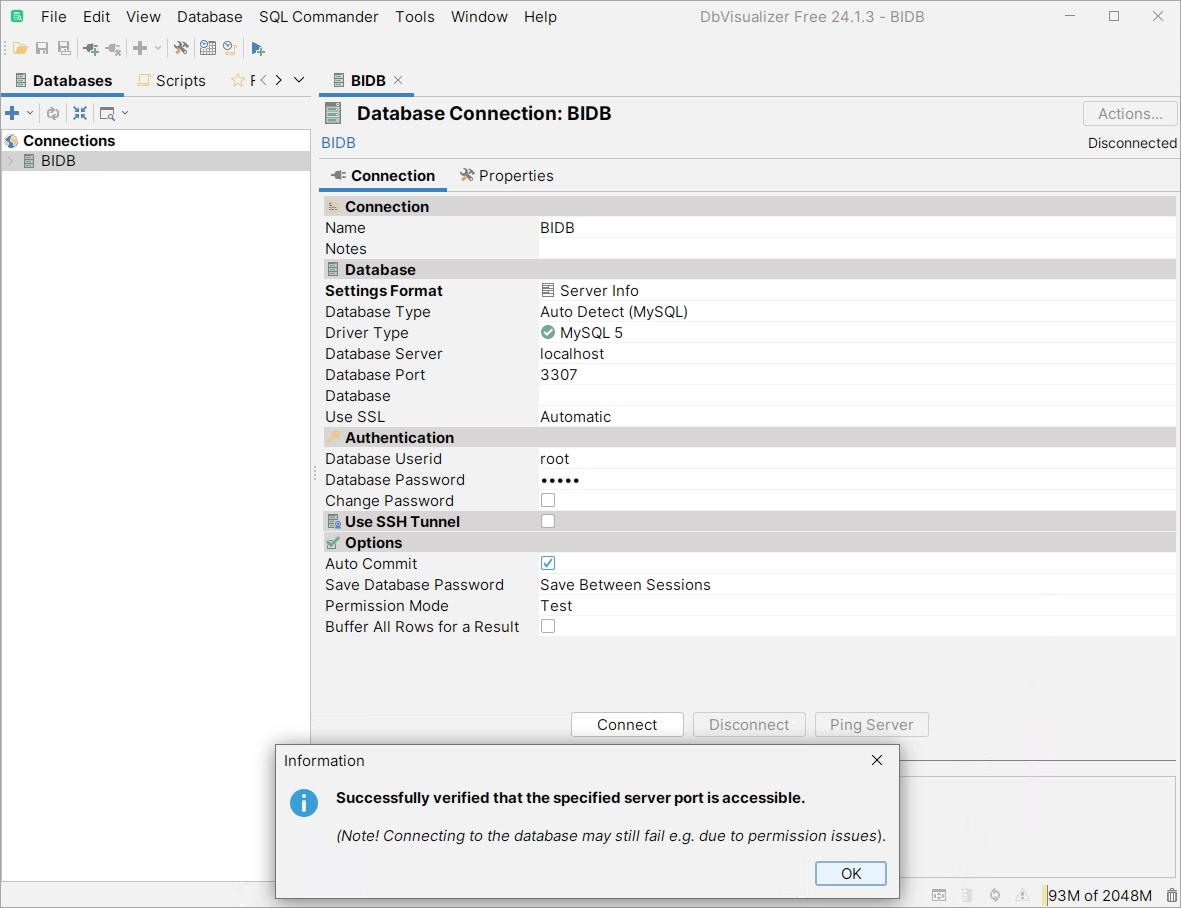
Ping the server & Connect.
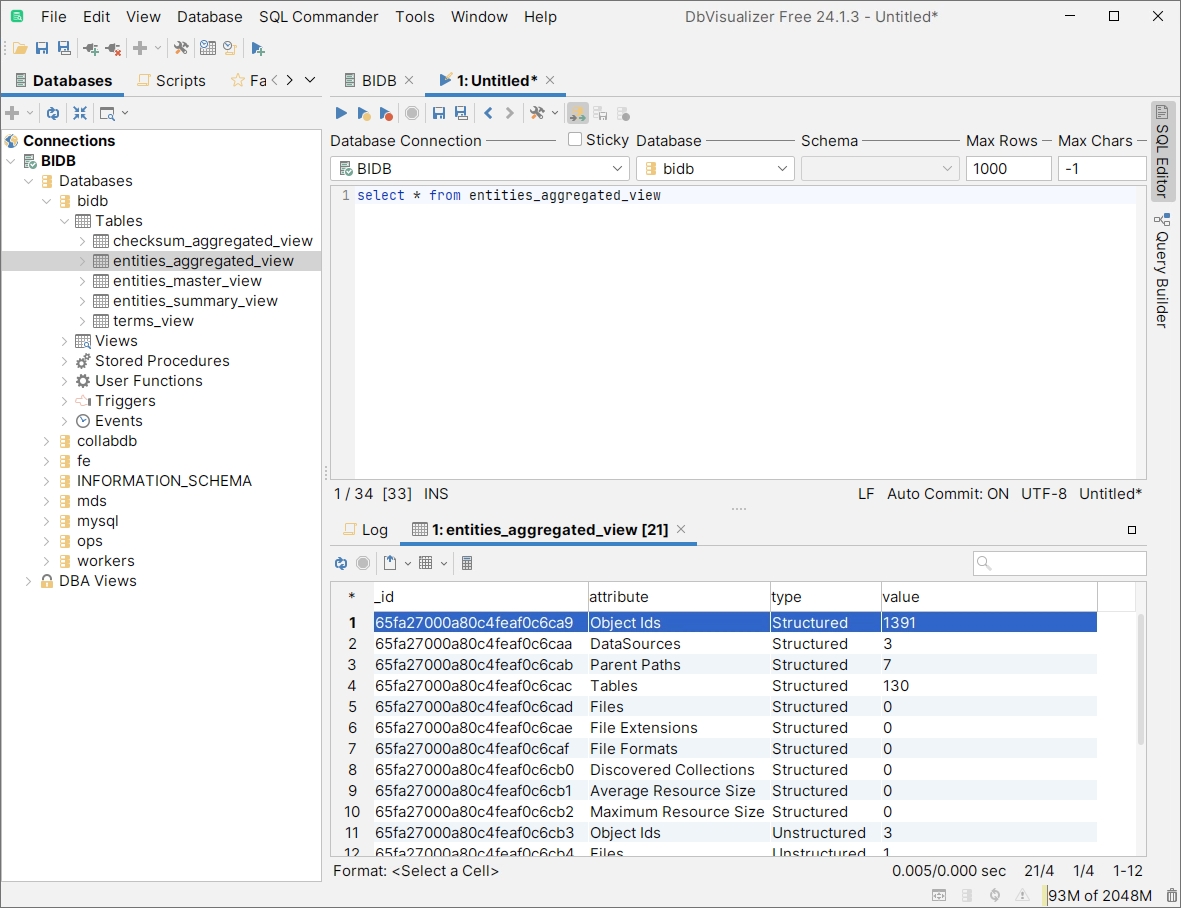
using SQL Commander, Query the database.
Was this helpful?