> For the complete documentation index, see [llms.txt](https://academy.pentaho.com/llms.txt). Markdown versions of documentation pages are available by appending `.md` to page URLs; this page is available as [Markdown](https://academy.pentaho.com/pentaho-data-integration/setup/data-sources/jupyter-notebook.md).
# Jupyter Notebook
Setup Jupyter Notebook ..
{% hint style="info" %}
#### **Jupyter Notebook**
Jupyter Notebook is an open-source web application that allows you to create and share documents containing live code, equations, visualizations, and narrative text. Originally developed for Python (the name comes from Julia, Python, and R), it now supports over 40 programming languages.
{% endhint %}
Jupyer Notebook
{% tabs %}
{% tab title="Linux" %}
{% hint style="info" %}
#### Jupyter Notebook - Docker
Running Jupyter Notebook in a Linux Docker container provides a portable, reproducible environment for interactive data science and development work. By pulling an official Jupyter Docker image (such as `jupyter/scipy-notebook` or `jupyter/minimal-notebook`) or building a custom one from a base Linux image with Jupyter installed via pip, you can launch a fully functional notebook server isolated from your host system.
The container typically exposes port 8888, which you map to your host using `docker run -p 8888:8888`, and Jupyter outputs a token-based URL for browser access. This approach ensures consistent dependencies across machines, simplifies environment setup, and allows easy teardown and recreation - making it ideal for reproducible research, team collaboration, and CI/CD pipelines where environment parity matters.
{% endhint %}
{% tabs %}
{% tab title="1. Directories" %}
{% hint style="info" %}
#### Directories
**`~/Jupyter-Notebook/`**
* **`datasets/`**
* `sales_data.csv` — Sample sales transaction data for analysis exercises
* `orders.csv` — Sample order data used in workshop scenarios
* **`notebooks/`**
* `sales_analysis.ipynb` — Jupyter notebook with sales data analysis examples
* `welcome.ipynb` — Introductory notebook to verify the environment is working
* **`pdi-output/`**
* `README.md` — Placeholder documenting the purpose of this directory for PDI output files
* **`reports/`** — Directory for generated report outputs
* **`scripts/`**
* `docker-compose.yml` — Defines the Jupyter container configuration, port mappings, and volume mounts
* `run-docker-jupyter.sh` — Shell script to start, stop, and check status of the Jupyter container (auto-detects `docker compose` vs legacy `docker-compose`)
* `file_watcher.py` — Python script that monitors directories for file changes
* `post-start.sh` — Script that runs automatically after the container starts for additional setup tasks
* **`workshop-data/`** — Directory for additional workshop-related data files
{% endhint %}
1. Update APT package index.
```bash
sudo apt update
```
2. Run setup script.
```bash
cd
cd ~/Workshop--Data-Integration/Setup/Jupyter\ Notebook/linux/
chmod +x ./copy-jupyter.sh && ./copy-jupyter.sh
```
copy-jupyter.sh
{% hint style="info" %}
**What the script does:**
1. Creates `~/Jupyter-Notebook/` with sub-directories: `datasets/`, `notebooks/`, `pdi-output/`, `reports/`, `scripts/`, `workshop-data/`
2. Copies `sales_data.csv` and `orders.csv` into `datasets/`
3. Copies `sales_analysis.ipynb` and `welcome.ipynb` into `notebooks/`
4. Copies `docker-compose.yml`, `run-docker-jupyter.sh`, `file_watcher.py`, and `post-start.sh` into `scripts/`
5. Creates a `README.md` inside `pdi-output/`
6. Sets correct file permissions (755 for scripts, 644 for data)cd
{% endhint %}
{% endtab %}
{% tab title="2. Notebook Docker Container" %}
{% hint style="info" %}
#### Notebook Docker Container
The script locates the docker-compose.yml file inside the scripts/ subdirectory of the Jupyter working directory, then delegates all container management to Docker Compose. It auto-detects whether the system uses the modern "docker compose" plugin or the legacy standalone "docker-compose" binary.
{% endhint %}
1. Start the Jupyter Notebook container
# Navigate to the scripts directory
cd
cd ~/Jupyter-Notebook/scripts/
chmod +x run-docker-jupyter.sh && ./run-docker-jupyter.sh start
{% hint style="info" %}
**What happens:**
* Docker pulls the `jupyter/scipy-notebook:latest` image (first time only, \~3 GB)
* Creates and starts a container named `jupyter-datascience`
* Maps port 8888 on the host to port 8888 in the container
* Bind-mounts the host directories into the container
{% endhint %}
run-docker-jupyter.sh
2. Verify the container is running.
```bash
# Check container status
./run-docker-jupyter.sh status
# Or use Docker directly
docker ps --filter name=jupyter-datascience
```
{% hint style="info" %}
You should see the container listed with status `Up` and port `0.0.0.0:8888->8888/tcp`
{% endhint %}
***
**Access Jupyter Lab.**
1. Open your web browser and navigate to:
{% embed url="" %}
{% hint style="info" %}
When prompted:
* **Token:** `datascience`
* **Password:** Set a password of your choice (optional)
You should see the Jupyter Lab interface with the mounted directories visible in the file browser sidebar.
{% endhint %}
Enter Token & Password: datascience / password
Jupyter Notebook
{% endtab %}
{% endtabs %}
{% endtab %}
{% tab title="Windows" %}
x
x
1. Create a Jupyter Notebook folder and copy the required files.
{% hint style="info" %}
**Create directory & copy - PowerShell**
```powershell
cd \
& "C:\Workshop--Data-Integration\Setup\Jupyter-Notebook\copy-jupyter.ps1"
```
{% endhint %}
2. Check the Directory has been created and the files copied over.
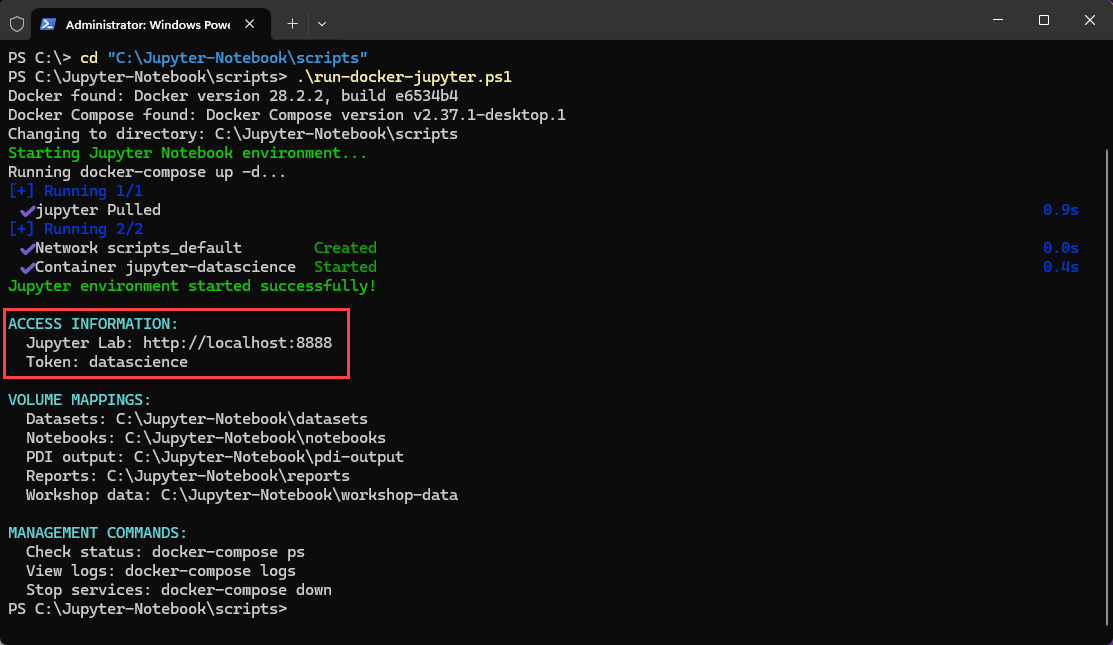
3. Execute the docker-compose script to create the container.
{% hint style="info" %}
**Jupyter Notebook Container - PowerShell**
```powershell
cd \
cd "C:\Jupyter-Notebook\scripts"
.\run-docker-jupyter.ps1
```
{% endhint %}
4. Check the container is up and running in Desktop Docker.
Deploy container - condensed screensho!
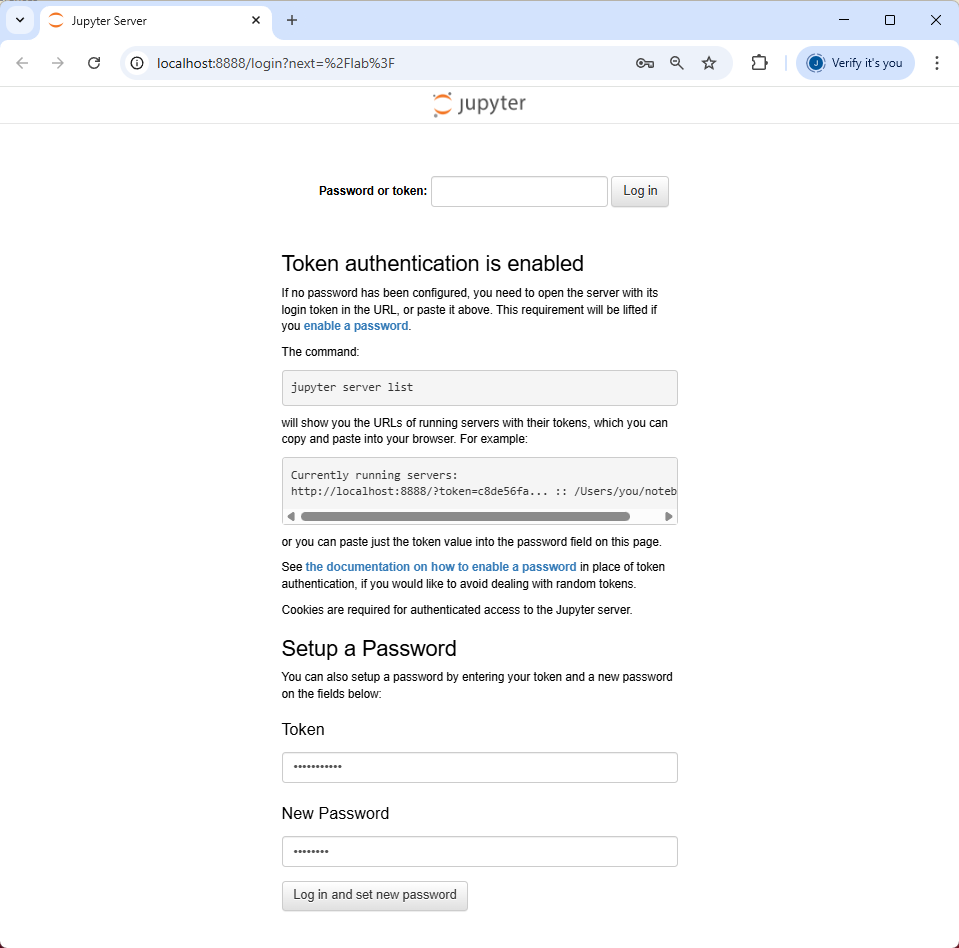
5. Log on to Jupyter Notebook UI:
{% embed url="" %}
Link to Jupyter Notebook UI
{% endembed %}
6. You will need to enter:
Token: datascience
Password: password
Enter Token and set password
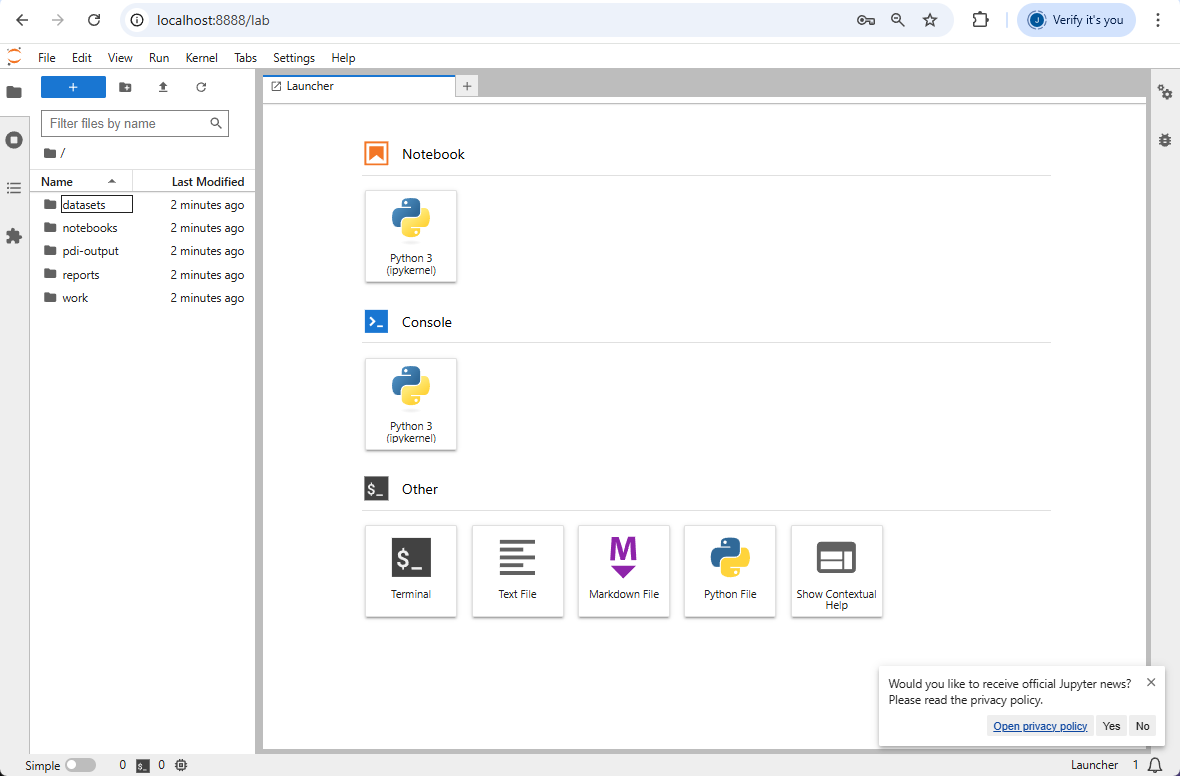
Jupyter UI
***
#### Test
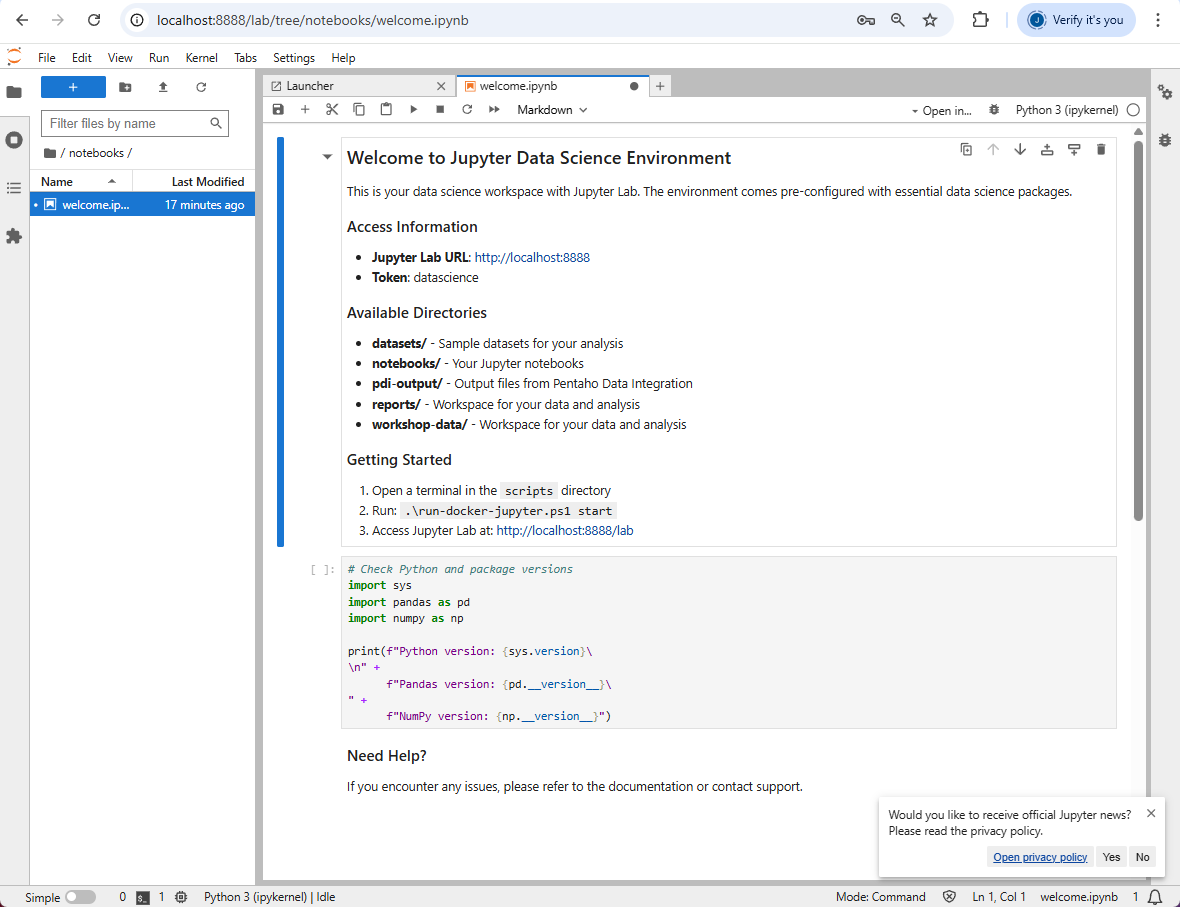
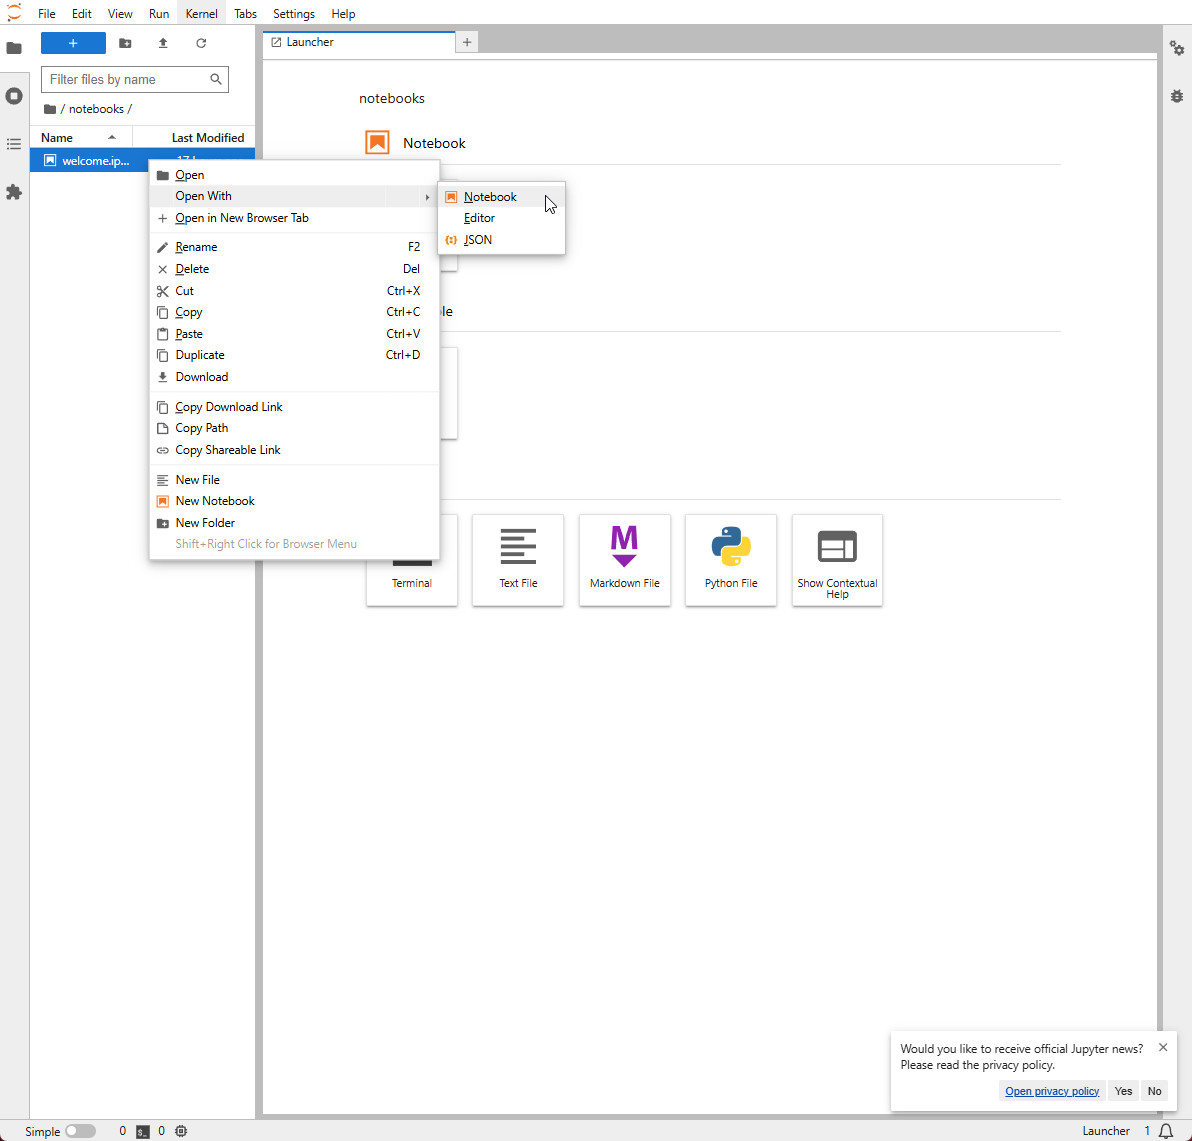
1. Expand the notebooks folder, and Open the welcome.ipynb notebook.
Open: welcome.ipynb
{% hint style="info" %}
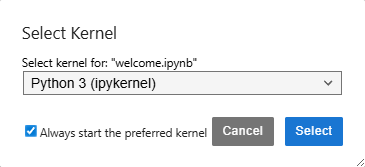
Check you have a Python Kernel.
To set as default, click on the Python 3 kernel | idle link:
{% endhint %}
welcome.ipynb
{% endtab %}
{% endtabs %}
---
# Agent Instructions
This documentation is published with GitBook. GitBook is the documentation platform designed so that both humans and AI agents can read, navigate, and reason over technical content effectively. Learn more at gitbook.com.
## Querying This Documentation
If you need additional information that is not directly available in this page, you can query the documentation dynamically by asking a question.
Perform an HTTP GET request on the current page URL with the `ask` query parameter, and the optional `goal` query parameter:
```
GET https://academy.pentaho.com/pentaho-data-integration/setup/data-sources/jupyter-notebook.md?ask=&goal=
```
`ask` is the immediate question: it should be specific, self-contained, and written in natural language.
`goal` is optional and describes the broader end goal you are ultimately trying to accomplish on behalf of the user. GitBook uses it to tailor the answer towards what is most useful for that goal.
The response will contain a direct answer to the question and relevant excerpts and sources from the documentation.
Use this mechanism when the answer is not explicitly present in the current page, you need clarification or additional context, or you want to retrieve related documentation sections.


 {% endhint %}